
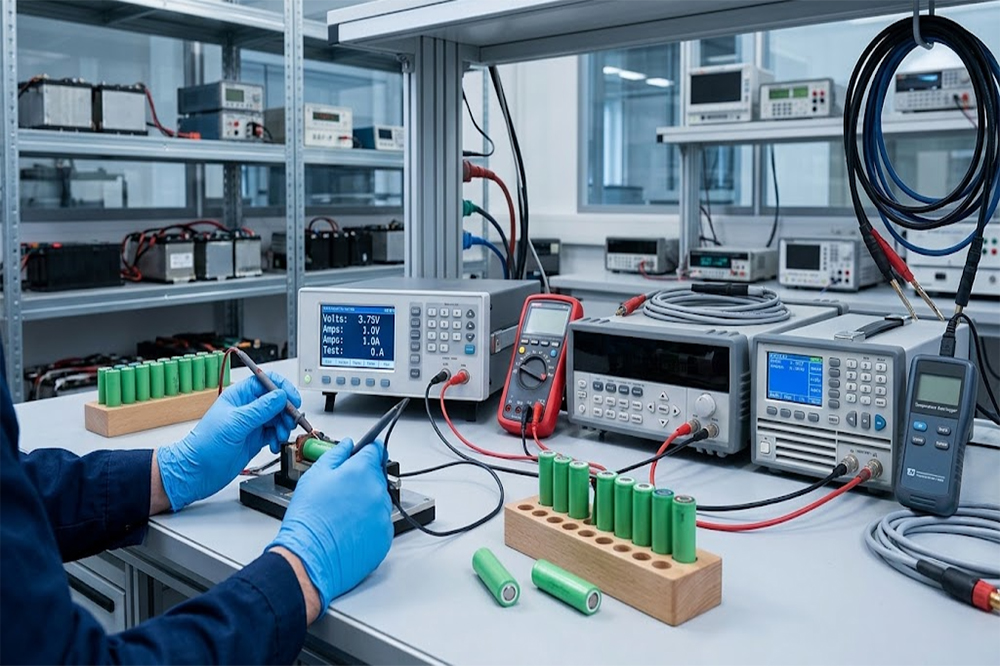
Testing 18650 battery involves more than checking its voltage. Capacity, internal resistance, discharge performance and physical condition all provide useful information about cell quality and battery health. Proper testing is especially important when selecting cells for OEM battery packs or checking incoming wholesale shipments.
Testing is only one part of selecting the right 18650 cell. Capacity, voltage, discharge current, dimensions, terminal design and battery chemistry all need to be considered before a cell is approved for production. If you are still comparing the basic specifications of different 18650 cells, start with our complete 18650 lithium battery guide, which brings the main specifications and common applications together in one place.
How to Test 18650 Battery Before You Trust It
An 18650 battery can look perfectly normal and still perform badly.
There may be no obvious damage on the outside. The voltage might even look correct when measured with a multimeter.
Then you put the cell under load and something changes.
The voltage drops too quickly.
The battery gets warm.
The actual capacity is much lower than expected.
Or the internal resistance is noticeably higher than other cells from the same batch.
This is why battery testing matters.
For someone using one or two cells, a simple voltage check may be enough to identify an obviously bad battery.
For a battery manufacturer buying thousands of cells, however, testing needs to go much further.
A useful 18650 inspection normally looks at several things:
- Physical condition
- Open-circuit voltage
- Internal resistance
- Actual capacity
- Discharge behavior
- Cell consistency
The more demanding the application, the more important these tests become.
Start With a Visual Inspection
Before connecting a cell to any tester, look at it.
It sounds basic, but this step is easy to skip.
Check the outer wrapper for:
- Tears
- Scratches exposing metal
- Swelling
- Corrosion
- Burn marks
- Damaged terminals
- Loose insulation
- Unusual deformation
The positive terminal should also be checked for damage.
If the cell has been used previously, look for signs of overheating or mechanical abuse.
For OEM production, visual inspection is often part of the incoming quality-control process before electrical testing starts.
A battery does not need to fail an electrical test to be unsuitable for production.
Physical damage alone can be enough to reject it.
Check the 18650 Battery Voltage
Voltage is usually the easiest measurement.
Set a suitable multimeter to DC voltage and carefully measure the positive and negative terminals.
A normal lithium-ion 18650 cell will usually show a voltage somewhere within its expected operating range depending on its state of charge.
A fully charged conventional lithium-ion cell is typically around 4.2V, while the nominal voltage is commonly around 3.6V or 3.7V, depending on the cell specification.
But there is an important point here:
Voltage does not tell you the full condition of the battery.
A cell can show 3.7V and still have poor capacity or high internal resistance.
This is why voltage should be treated as the first test, not the final test.
If you want to understand the difference between nominal voltage, full-charge voltage and pack voltage, our 18650 battery voltage guide is a useful supporting article to link here.
Checking the voltage is usually the first step when testing an 18650 cell, but the number on the multimeter needs some context. A reading of 3.7V does not mean the battery is half charged, nor does 4.2V tell you whether the cell is still healthy. If you want to understand nominal voltage, full-charge voltage and the normal voltage range of an 18650 cell, our 18650 battery voltage guide explains these numbers in practical terms.

Measure Internal Resistance
The next useful test is internal resistance.
Internal resistance affects how much voltage the cell loses when current flows through it.
For example, two cells can both measure 3.7V with no load.
Once a high-current load is connected, however, one cell may maintain its voltage better than the other.
That difference can often be related to internal resistance.
A dedicated battery analyzer or internal resistance tester can provide a resistance measurement.
When comparing cells, try to keep the test conditions consistent.
Use the same:
- Tester
- Temperature
- State of charge
- Measurement method
- Waiting time before testing
Otherwise, you may end up comparing numbers that are not really comparable.
Our article on 18650 battery internal resistance explains the relationship between resistance, voltage sag, heat and battery aging in more detail.
This is particularly useful when testing cells intended for high-current applications.
A voltage reading alone cannot show how well an 18650 cell will perform under load. Two cells may both read 3.7V at rest but show very different voltage drops when current starts flowing. Internal resistance is one of the reasons behind this difference. Our detailed guide to 18650 battery internal resistance explains how resistance affects voltage sag, heat generation and high-current performance, and how the measurement can be used when comparing cells.
Test the Actual Capacity
This is where battery testing becomes much more meaningful.
A cell marked 3000mAh does not mean you will always get exactly 3000mAh in every application.
Actual capacity depends on testing conditions.
These can include:
- Charge method
- Discharge current
- Cutoff voltage
- Temperature
- Cell age
- Testing equipment
A proper capacity test normally involves fully charging the cell according to the manufacturer’s specification and then discharging it under a controlled current until the specified cutoff voltage is reached.
The tester records the delivered capacity.
For example, if a cell rated at 3000mAh delivers approximately 2950mAh under the specified test conditions, that result is very different from a cell delivering only 2200mAh.
This is why capacity testing is much more useful than simply reading the number printed on the cell.
Capacity testing is a little different from simply reading the number printed on the cell. A battery labeled 3000mAh may deliver a different result depending on the discharge current, cutoff voltage and test conditions. Before comparing test results, it helps to understand what mAh, Ah and Wh actually tell you. Our guide to 18650 battery capacity, mAh, Ah and Wh breaks down these measurements and explains how they relate to real battery energy.

Why mAh Alone Can Be Misleading
Capacity is important, but it is only one part of the selection process.
Suppose you have two cells:
Cell A: 3500mAh
Cell B: 3000mAh
It would be tempting to say Cell A is better.
But what if your application requires 15A continuous discharge?
If Cell B has substantially better high-current performance and lower voltage sag, it may be the better choice.
This is why capacity testing should be combined with discharge testing and resistance measurements.
Our article on 18650 battery capacity, mAh, Ah and Wh can be used here as an internal link for readers who want to understand what the capacity numbers actually mean.
Test the Battery Under Load
A battery can behave differently when it is actually working.
A load test measures how the voltage responds when current is drawn from the cell.
This is especially useful for:
- Power tools
- E-bikes
- Robotics
- Portable power systems
- High-power electronics
During a load test, monitor:
Initial voltage → loaded voltage → voltage recovery → temperature
A healthy cell should behave reasonably consistently with its specifications.
If the voltage drops dramatically under a relatively moderate load, that may indicate high internal resistance, aging or another problem.
The exact acceptable result depends on the cell model and test conditions.
Do not compare a high-capacity cell with a high-drain cell without considering their different design targets.
Temperature Is Part of the Test
Temperature should not be treated as an afterthought.
During charging or discharging, a battery can warm up.
A moderate temperature increase under load may be normal.
Excessive heating, however, deserves investigation.
If one cell in a group becomes significantly hotter than the others during the same test, that is worth paying attention to.
It may indicate differences in internal resistance or another cell-level problem.
For production testing, controlling the test environment makes the results more reliable.
Testing one batch at room temperature and another batch in a much warmer environment does not give you a clean comparison.
How to Check a Used 18650 Battery
Used 18650 cells require more careful testing than new cells.
Start with the physical condition.
Then measure voltage.
After that, test internal resistance and capacity.
A used cell may still have enough capacity for a low-power application while being a poor choice for a high-current battery pack.
This is where internal resistance becomes particularly useful.
As lithium-ion cells age, internal resistance can increase.
The result may be more voltage sag and more heat during discharge.
So a used battery should not be judged by voltage alone.
How to Identify an Unbalanced Group of 18650 Cells
This becomes important when several cells are used together.
Imagine you have ten cells that appear to be the same model.
Their open-circuit voltages are similar.
However:
- Two have significantly higher resistance.
- One has much lower capacity.
- Several have different discharge behavior.
Putting all of them into the same battery pack may create problems.
For pack production, cells should be selected and matched according to the requirements of the design.
This is particularly important for series-connected configurations.
Our 18650 series and parallel configuration guide is a useful next step when you are testing cells for a multi-cell pack because it explains how series and parallel arrangements affect the overall battery system.
High-Drain Cells Need More Than a Capacity Test
If you are testing an 18650 battery for a high-current application, don’t stop after measuring mAh.
You should also pay attention to:
- Continuous discharge capability
- Peak current requirements
- Voltage sag
- Internal resistance
- Temperature rise
A cell can deliver good capacity at a relatively low discharge current and still be unsuitable for a high-power device.
For power tools and similar equipment, the battery needs to deliver current without excessive voltage drop or heating.
Our guide to high-drain 18650 batteries can be linked here because it explains how discharge current and C rating relate to real-world applications.
A Simple 18650 Testing Workflow
For a small number of cells, a practical workflow could look like this:
Step 1: Visual inspection
Reject cells with damaged wraps, terminals, corrosion or other obvious problems.
Step 2: Voltage check
Record the open-circuit voltage.
Step 3: Internal resistance
Measure resistance using the same testing method for all cells.
Step 4: Controlled charging
Charge the cell according to its specified charging requirements.
Step 5: Capacity test
Discharge the cell under controlled conditions and record the measured capacity.
Step 6: Load test
If the application requires high current, evaluate voltage sag and temperature.
Step 7: Record the results
Keep the data so cells can be compared and matched.
This process is much more useful than simply checking whether the battery “has voltage.”
Testing 18650 Cells for OEM Production
For OEM battery manufacturers, testing needs to be more systematic.
You may be receiving thousands of cells from one production batch.
Testing every characteristic manually would be inefficient.
Instead, manufacturers can establish an incoming inspection standard.
For example, the quality-control process might define acceptable ranges for:
- Capacity
- Internal resistance
- Voltage
- Physical dimensions
- Appearance
- Production batch
- Cell consistency
The exact limits should come from the cell specification and the requirements of the final battery pack.
For larger projects, sample testing and batch-level quality records are also useful.
If a problem appears later in production, having the original test data makes it much easier to identify where the issue came from.

Testing Cells Before Building a Battery Pack
One of the most expensive mistakes is discovering a cell problem after the battery pack has already been assembled.
Once cells have been welded together, troubleshooting becomes more complicated.
A better approach is to test and sort cells before assembly.
Depending on the application, the manufacturer may classify cells according to:
- Capacity
- Resistance
- Voltage
- Batch
- Performance
Cells with similar characteristics can then be grouped together.
This is particularly useful for larger battery packs where consistency has a direct effect on pack performance.
Testing becomes even more important when individual 18650 cells are going to be assembled into a battery pack. Cells connected in series affect pack voltage, while parallel connections increase available capacity and current capability. More importantly, cells with noticeably different characteristics should not simply be mixed together. Before assembling a multi-cell pack, see our 18650 series and parallel configuration guide to understand how cell configuration affects the finished battery.
What Should Wholesale Buyers Ask for?
If you are purchasing 18650 cells in bulk, ask the supplier about their testing process.
Useful questions include:
- How is capacity tested?
- What discharge current is used?
- What cutoff voltage is used?
- How is internal resistance measured?
- At what temperature are cells tested?
- Are cells tested individually or by sampling?
- How are cells matched?
- Can batch test data be provided?
- What quality standards are used for incoming and outgoing inspection?
The goal is not to collect a huge spreadsheet of numbers.
The goal is to know whether the cells you receive will behave consistently in your product.
Don’t Test One Cell and Assume the Whole Batch Is Identical
This is another practical point.
Testing one sample can tell you something about that sample.
It does not prove that every cell in a large shipment has exactly the same performance.
For wholesale orders, a reasonable inspection plan should consider batch consistency and sampling.
For critical OEM applications, the inspection level may need to be stricter.
The right approach depends on the application, order quantity and acceptable risk.
Final Thoughts
Testing an 18650 battery does not have to be complicated, but it should be systematic.
Start with the physical condition.
Check voltage.
Measure internal resistance.
Test actual capacity.
Then, if the application requires significant current, evaluate the cell under load and monitor temperature.
For individual users, this can help identify obviously weak or damaged cells.
For OEM and wholesale buyers, testing has a much bigger role. It helps verify incoming quality, compare suppliers, match cells and reduce problems during battery-pack production.
Most importantly, don’t let one specification make the decision for you.
A good 18650 cell is not simply one with a high mAh number.
It is a cell whose electrical and physical characteristics match the product you are building.
Once the required capacity, discharge current and testing criteria are clear, the next step is to compare cells that actually match the project. For OEM and wholesale buyers, this may include checking different capacity options, cell specifications and application requirements before moving to battery-pack production. You can explore our 18650 lithium battery products to see the available cell options and contact us if you need help selecting cells for a custom battery pack.
FAQs
How do you test an 18650 battery?
Start with a visual inspection and voltage measurement. For a more complete evaluation, test internal resistance, actual capacity and discharge performance using suitable battery testing equipment.
How do I test 18650 battery capacity?
Fully charge the cell according to its specification, then discharge it under a controlled current to the specified cutoff voltage. A battery analyzer can record the actual delivered capacity.
Can a multimeter test an 18650 battery?
A multimeter can measure the cell’s voltage, but it cannot provide a complete assessment of battery health. Capacity, internal resistance and discharge behavior require additional testing equipment.
How do I know if an 18650 battery is still good?
Check its physical condition, voltage, internal resistance and measured capacity. A cell that shows normal voltage but has very high resistance or significantly reduced capacity may no longer be suitable for demanding applications.
Should 18650 cells be tested before building a battery pack?
Yes. Testing and matching cells before assembly can help identify weak cells and improve consistency across the finished battery pack.
Leave a Reply